An efficient way to process specific types of emails to help in a business workflow is to have them forwarded to a trigger email address. This allows the instant invocation of an automation to produce the results you want and need within a couple of minutes or less.
This requires a one-time setup, to define which emails should be processed. The below guide will assist in setting up an email trigger, and choosing the emails for it to react to. The example in this guide handles payment notifications received via email, although this can be implemented for thousands of other use cases.
Use cases will be specific to your automation, so the values that are entered will be different, however the process to add the email forward will likely be very similar.
Follow through the steps one by one and be sure to follow the image and the accompanying annotations. You can click the below buttons to skip ahead to specific common steps.
One-time setup for adding a forwarding address.
Google Mail Settings
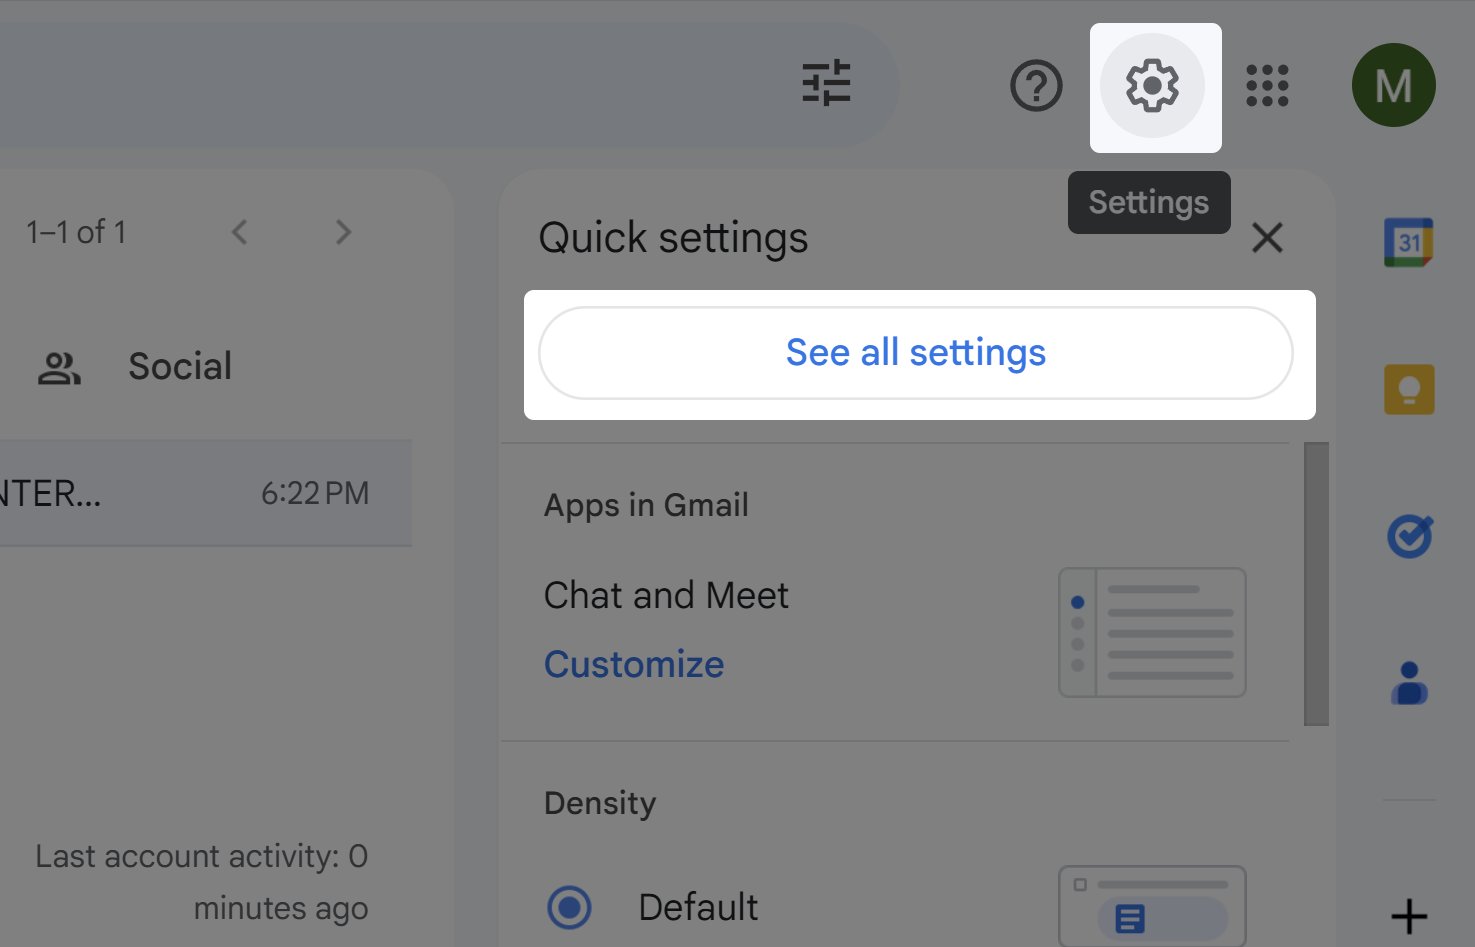
Login to the Gmail web client, and find the cog icon to open the settings menu. Open the settings menu and click on “See all settings”
Navigate to Forwarding
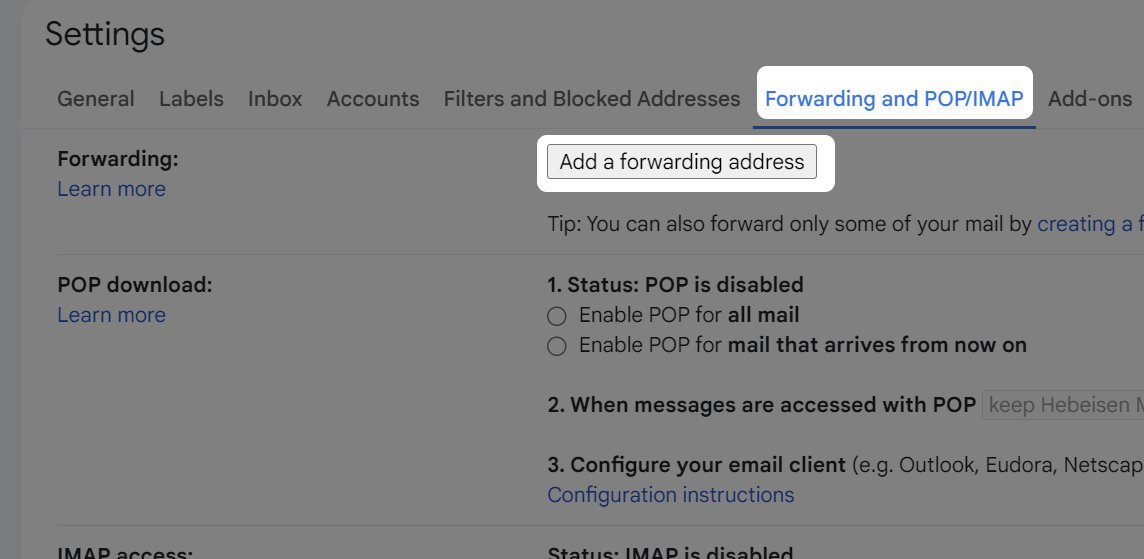
Click on the “Forwarding and POP/IMAP” Tab to see the forwarding settings. Click on the option “Add a forwarding address”
Specify the trigger address
Enter the email that was provided to you for this step. Each automation is unique and will have a different email address to trigger your automations specifically.
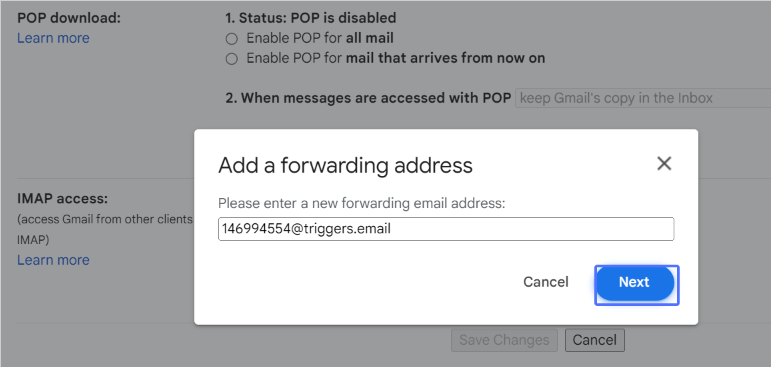
A popup will appear, asking you to verify the action of adding the email as a forwarding email address. Click Proceed.

Confirmation Process
A confirmation dialog will appear in the original window mentioning that verification on our end is required. We will confirm when this is completed. Once the email forward is verified, you may setup filters to have specific types of emails forwarded. to the automation trigger.
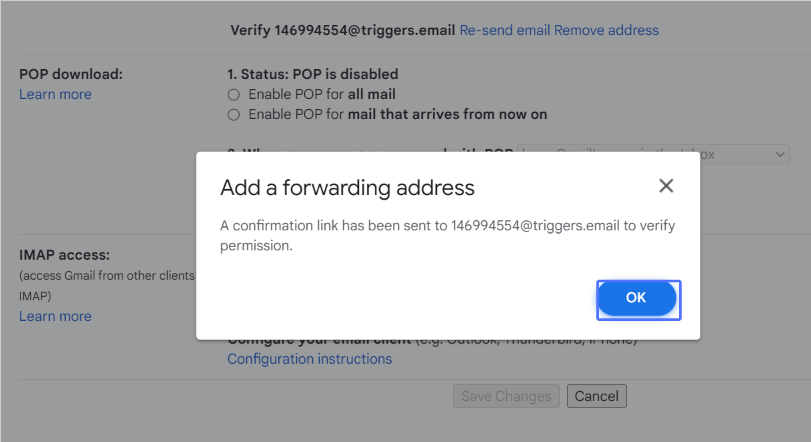
Keep disabled by default
Once verified, you can also see the email entry showing up as a forwarding option in the settings screen. Please note that this is disabled by default. Keep it disabled as we only need very specific emails to be forwarded for our automation use cases.

This concludes the one-time setup for adding a forwarding address.
A filter and action is required for each automation. Please proceed to the next section when ready.
Defining email filters to forward emails to automations.
Selecting a recurring email
To forward a specific type of email, first find an example of such an email. Note the characteristics of the email notification, such as a phrase in the subject or email body. We will guide you on these specifics for your use case, but in this example, we have noted that these types of emails contain the text “sent you money” in the subject.
With the email open, click the three dots in the task bar and click “Filter messages like these”
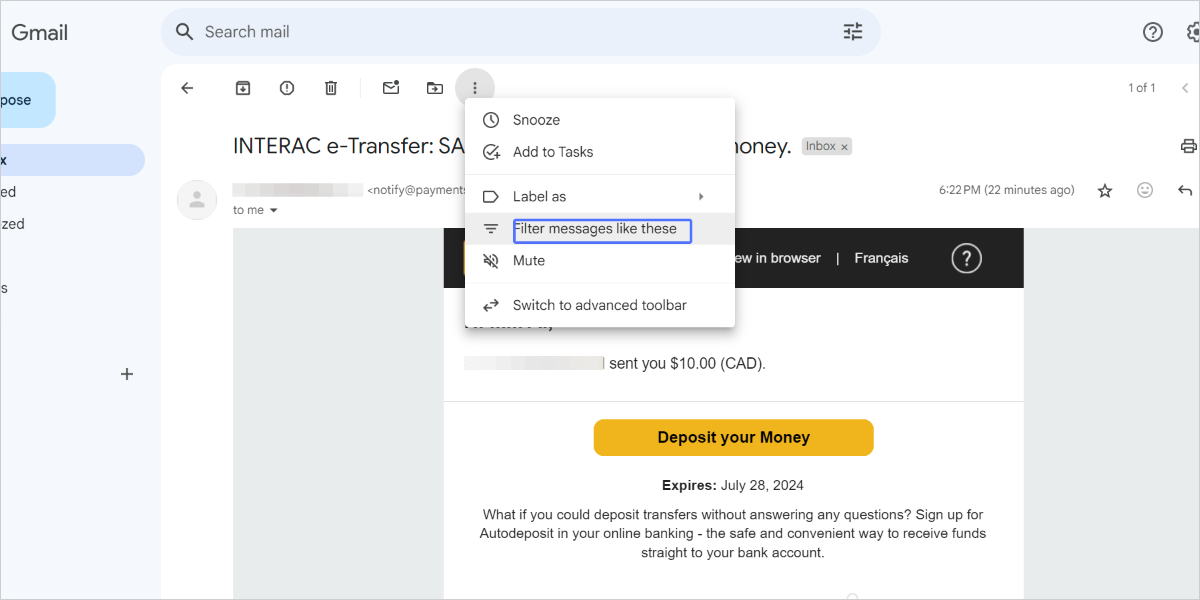
Creating an email filter
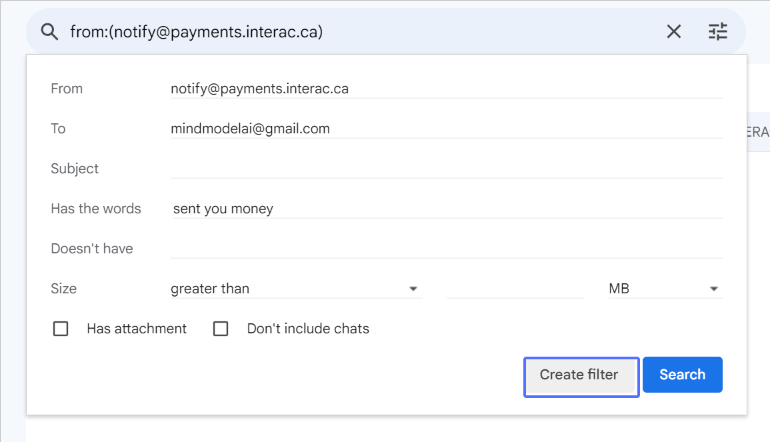
There are 2 steps in setting the email forwarding. First, we will make a filter that defined the pattern it should look for in emails to decide whether or not to forward them. In this filter panel, use the from email that is pre-populated, and add “sent you money” in the “Has the words” input field.
If this mailbox of yours handles a number of your email addresses, it may be a good idea to put the particular email that this notification was sent to specifically, in the “To:” field. This will add specificity to the filter. Then click “Create filter”.
Specify the forward address
Once the filter is created, you can specify different actions to be taken. For this use case, we will check the “Forward it to” checkbox and specify the trigger email that we setup earlier.
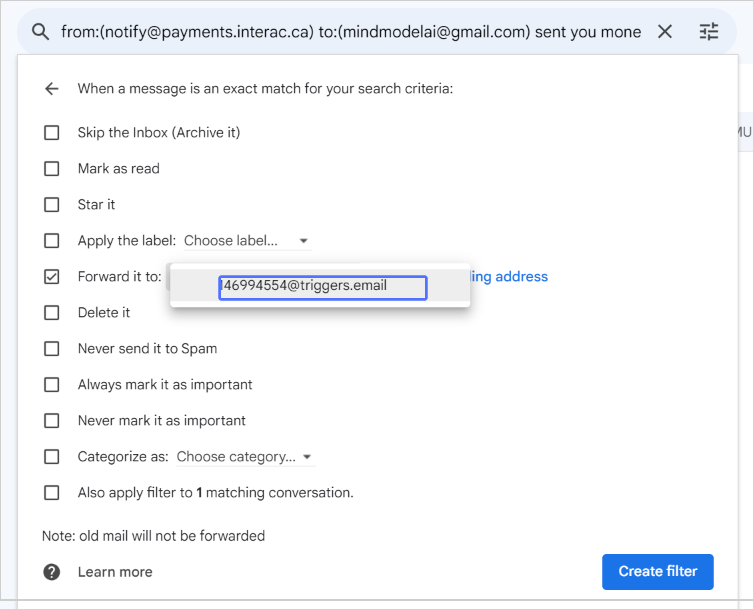
If you wish, you can also further categorize emails like these to be moved outside of your inbox or have special flags set. This might be helpful for you, especially once the automations are working. It certainly helps with inbox clutter. Once satisfied, click “Create Filter”
Modifying filters
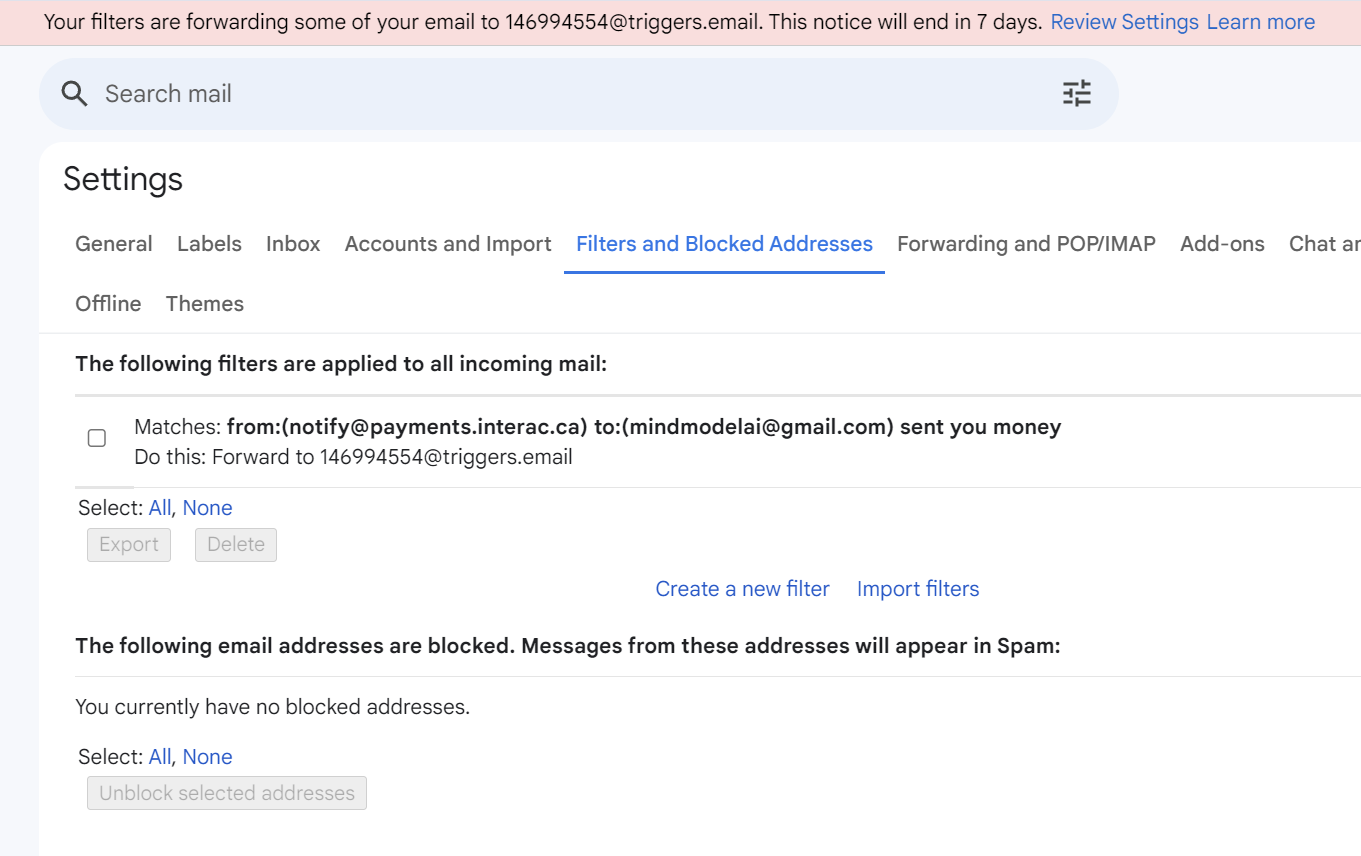
The setup is complete! If ever you want to change this behavior, you can find your filters in the “Filters and Blocked Addresses” section of the settings page. Incidentally, you may see a warning that some emails are forwarded.
This notice will go away in a week, and is designed to warn you of malicious setups that you may not be aware of.
One-time setup for adding a forwarding address.
Yahoo Mail Settings
Log in to your Yahoo Mail account. Click the gear in the upper-right corner of the page, next to your name – Note that Forwarding is available only if you have Yahoo Mail Pro or subscribe to Access + Forwarding.
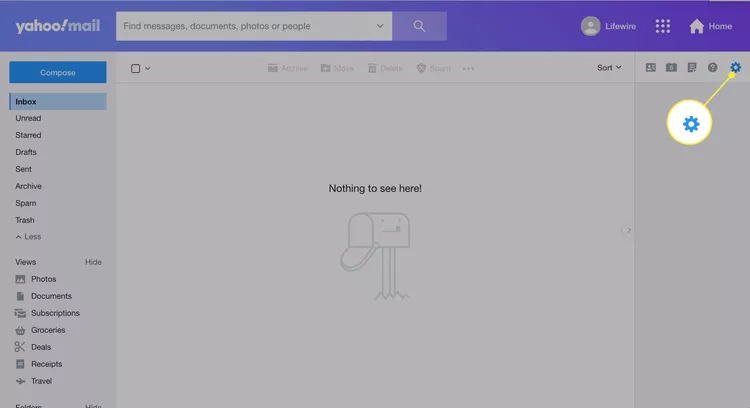
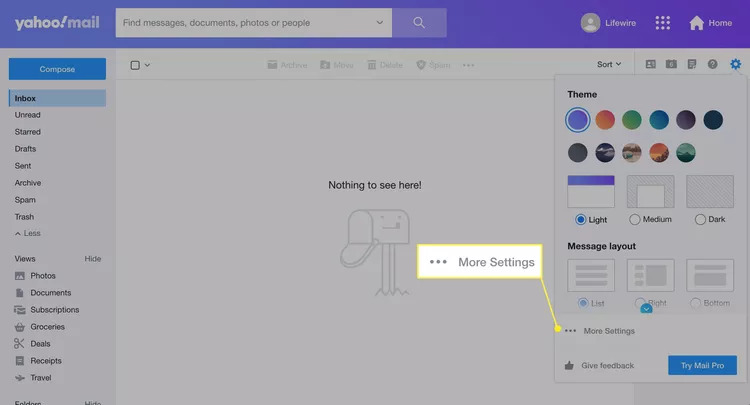
Locate More Settings
Select More Settings.
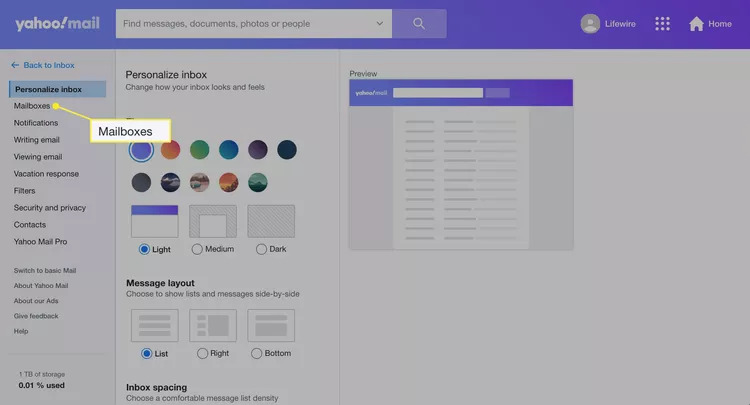
Locate Mailboxes
locate the mailboxes settings on the left menu
Select Primary Email
Select your primary email mailbox.
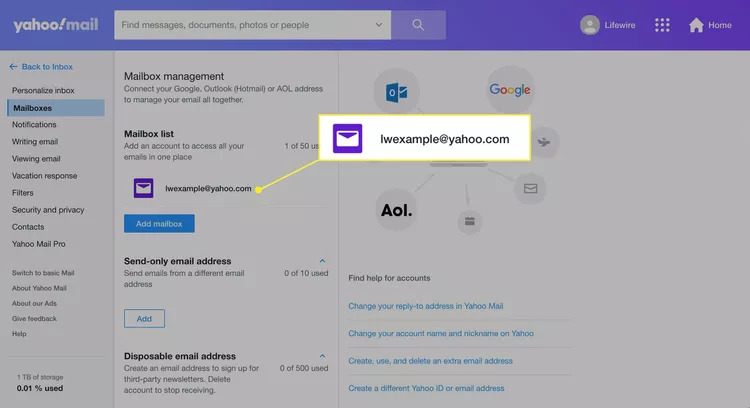
Forwarding Settigns
In the panel on the right, scroll down to the Forwarding field, enter the address to which you want your Yahoo mail forwarded, and select Verify.
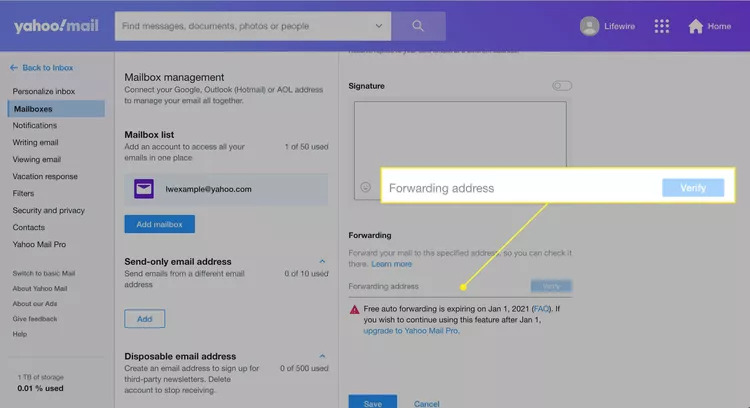
This concludes the one-time setup for adding a forwarding address.
One-time setup for adding a forwarding address.
Outlook Mail Settings
Login to the Outlook web client, and find the cog icon to open the settings menu.

Navigate to Forwarding
Once in settings, locate the mail tab in the left menu and click on rules. In there, you’ll need to add a rule setting for the mail to be forwarded.

Specify the Rule Setting
To forward a specific type of email, first create a new rule and name it, for example, “Forward Emails.” Set the condition to “Subject includes ‘sent you money'” (this is just an example; each case may vary, and we will guide you as needed). For the action, choose “Forward to” and enter the forwarding email address, such as example@example.com. Make sure to check “Stop processing more rules” so that other rules don’t interfere with this one. Save the rule.

Save the Rule
Lastly, make sure to save the rule and confirm the process.

Keep disabled by default
Once verified, you can also see the forward setting in the menu. Note that the rule configuration manages the emails we want to forward – Keep it disabled as we only need particular emails to be forwarded for our automation use cases.

This concludes the one-time setup for adding a forwarding address.
